The machine is no longer in ad.k-space.ee domain, as it doesn't exist. Previously it wasn't used much. Access is on-demand, request from Erki Aas.
¶ Windows Server
The Dell R620 with Windows Server 2019 is intended for administration of other things, such as:
- Blade iLO over Internet Explorer with Java (hurts, doesn't it).
- Configuration of our managed switches.
- Other Windows-only things, or what's behind a separate VLAN not normally accessible via VPN (aka ancient and insecure things what are working well, not needing to be replaced).
It is not the domain controller, but can be used to interact with it.
¶ Accessing the machine.
Any active domain user, with access to the VPN has access to the machine.
On Linux, Remmina is a good client; Windows has a built-in Remote Desktop Connection. The same is available on Mac as well.
Domain of the server:
windows-admin.ad.k-space.ee
Domain of the server is currently unavailable. Use
172.23.0.10or2001:bb8:4008:23::10instead.
Domain for logon:
ad.k-space.ee
Username and password are the same, as you have used elsewhere, for example on Authelia.
The machine might be restarted for Windows Updates™. Your session might not persist.
¶ Accessing ancient iDRAC (6) consoles from the server.
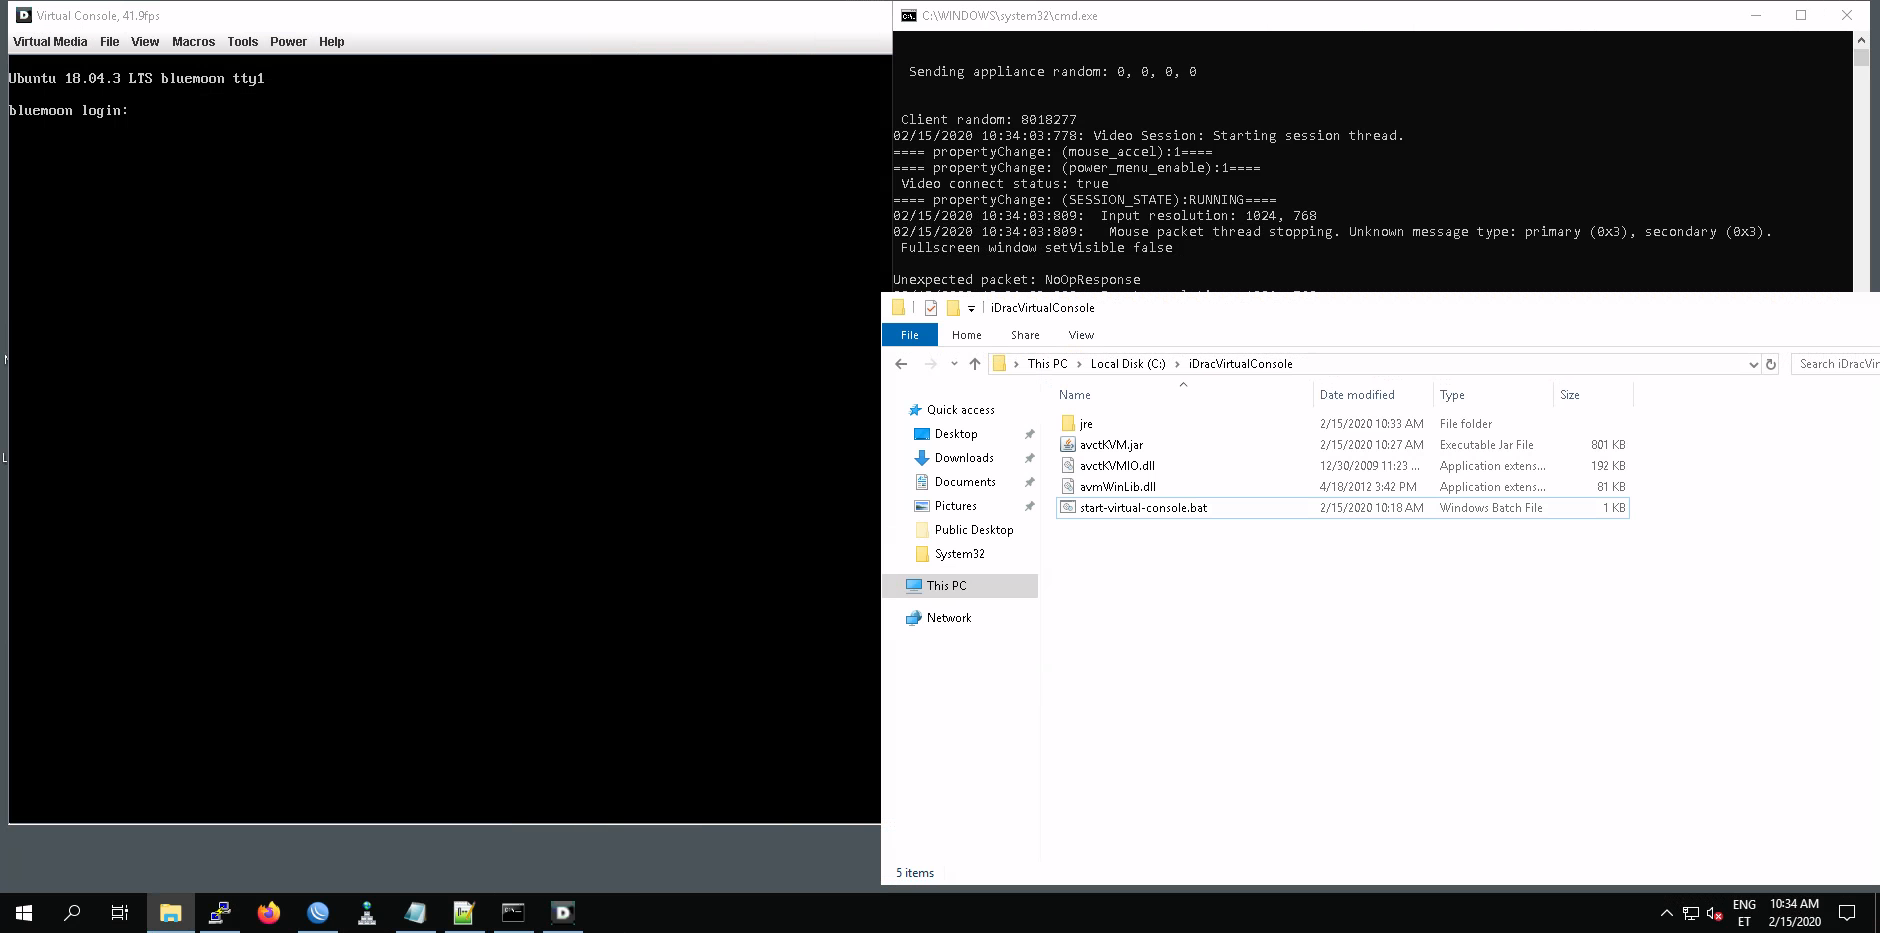
Dell servers (R710 generation) feature iDRAC6 for remote management. Its webui is accessible with all kinds of browsers (for example with Firefox installed on the admin server), which allows you to reboot the server, look at it's logs and much more. It's KVM console, however, is based on an ancient Java console, which is really hard to use, as browsers have dropped Java applet support, especially for old and insecure applets, such as the iDRAC console. As a workaround, someone has created a script, which uses older Java (1.7.0) and jars from the iDRAC itself to enable connection to the console.
It's all set up on our admin server and works for R710 iDRAC6 without problems.
Script with all the dependencies can be found and ran in C:\iDracVirtualConsole

¶ Mounting NFS
There was a situation, where mounting a NFS share under Windows
Server 2019 from FreeNAS NFS share was needed.
Therefore, you could probably assume that instructions given here would
also be applicable for Windows Server 2016, Windows 10, Linux-based NFS
server etc.
-
The idea is simple: you use NFS Client tool (which is called mount.exe) to mount the NFS share.
-
In my case, there was no auth on the share but just IP limit.
-
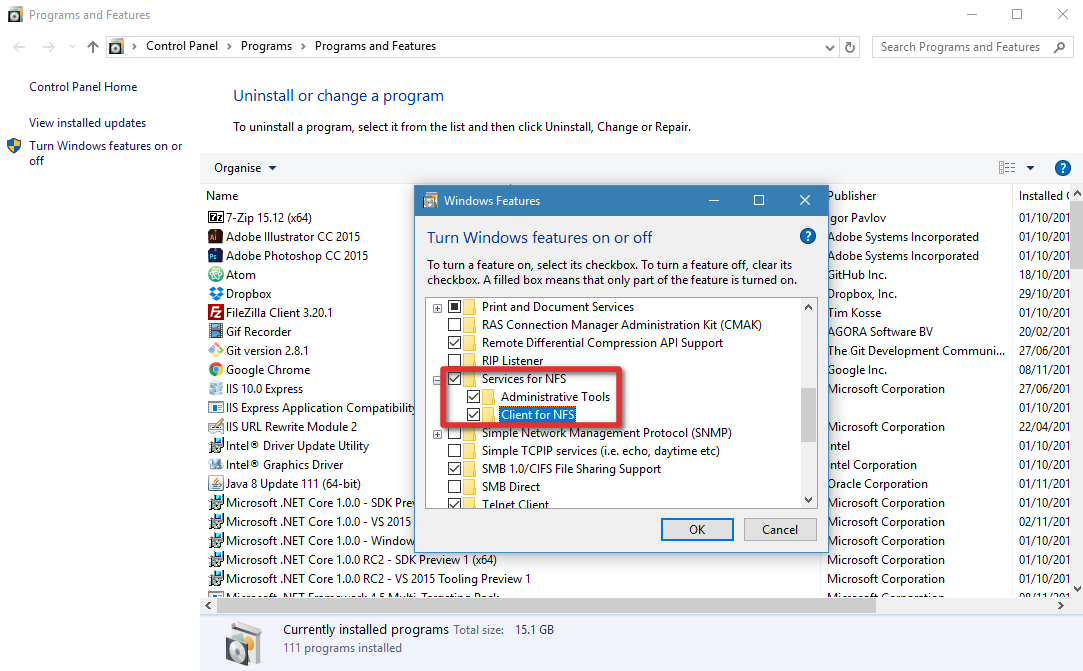
First you have to install NFS Client tools:

or use elevated PowerShell:Install-WindowsFeature NFS-Client -
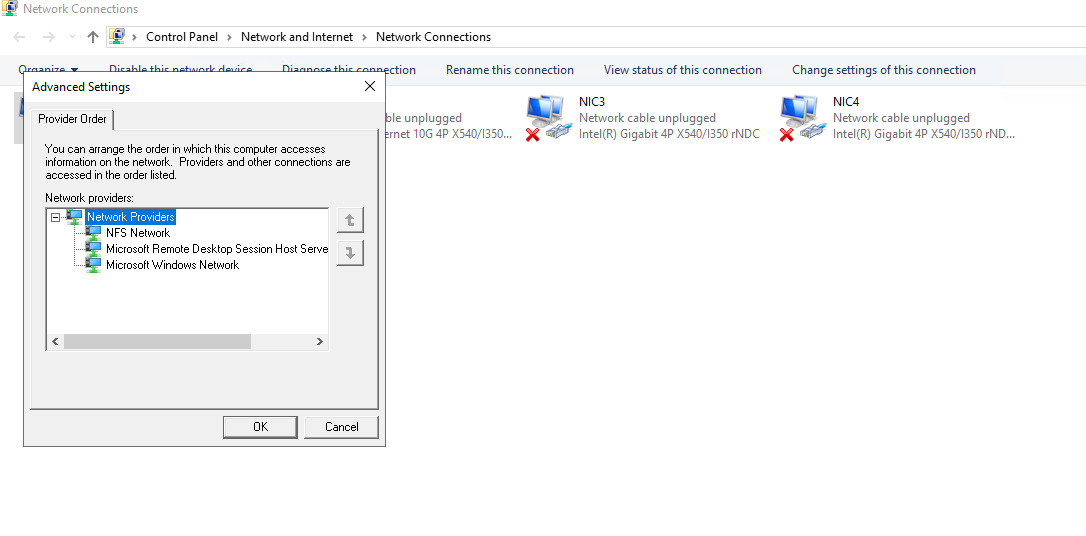
Then you have to set Windows to prefer NFS over other storage protocols for desired and used interface. This is important.
Go to Control Panel and find your network interfaces/ connections. Single click on desired one. Press ALT. You should see an extra toolbar to appear. Click Advanced, then Advanced Settings from appeared dropdown. You should see Provider order. Move the NFS to be the first.


-
Open Command Prompt and enter the mount command. For example:
mount -o nolock \\172.20.8.9\mnt\fry\migra X:X will be your disk letter in Windows. Keep in mind that the option
nolockis important. I couldn't properly write file with locking on. -
Disconnect afterwards via right-clicking in Explorer, or with:
umount X:
It is also possible to set UID/GIDs of the Windows client. Further instructions can be found on the Internet. For example: https://graspingtech.com/mount-nfs-share-windows-10
¶ (Re)installing Windows Server 2019 on Dell R620
- There was an image made of the installed state. Re-imaging instead of installing is probably a good idea. Ask Erki Aas.
- Get a Windows Server 2016 disc.
- Go to the Lifecycle Controller and deploy the OS, choosing Windows Server 2016.
- Install Windows. Some drivers may not be there, try to update them.
- Note: It may be the iDRAC/lf controller itself, what is outdated.
- Take your Windows Server 2019 USB install drive and insert it.
- Disable Windows Defender RTL protection (unless you like waiting for days).
- Upgrade to Windows Server 2019. Warning: Upgrading performs a full format!
If you get stuck, you may ask Erki Aas for help. Over much time, he
donated a few ear hairs (in the server room) for our well-being.