This page literally contains everything you realistically want to do with the machine. RTFW!
Wash your hands before and after working with the machine.
PoC: Rasmus
Copied spare vending machine key is in the hands of Erki.
Two original still lost??? One should've always been in keybox
2024-07-17 Lauri contacted Coffee Address, who said they don't service these machines anymore (EoL). The firdge doesn't cool, heats it more. As part of 2024 hackathon, will see about getting an AC guy.
Alcoholic beverages: just don't. Legal responsibility is too large (for times + validation + disabling and covering on events).
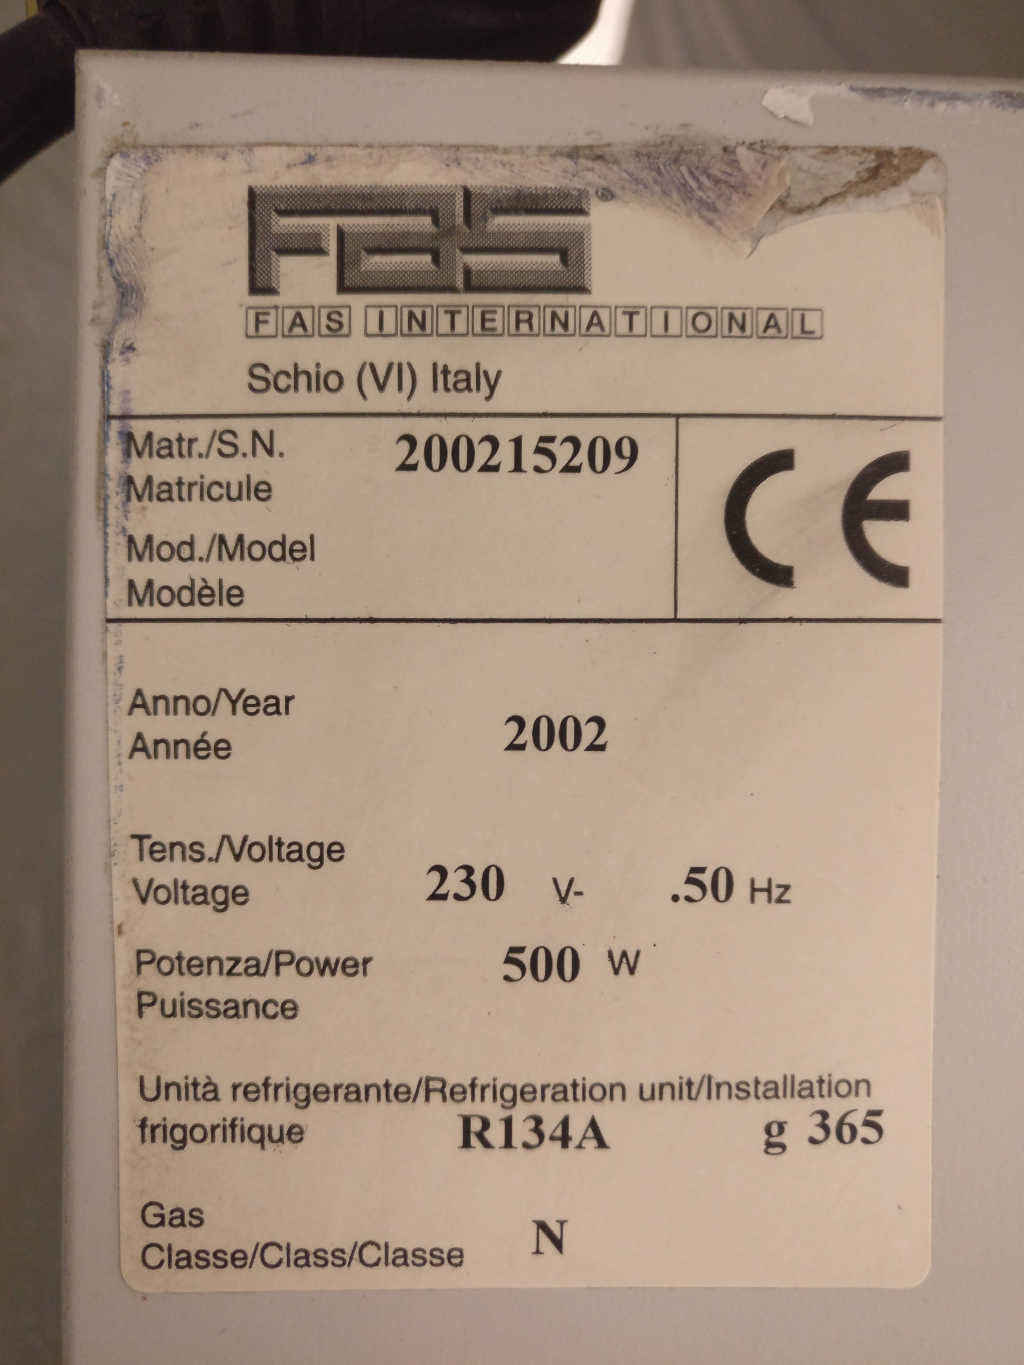
¶ Model
By FAS International
One of these or a combination of:
Spirali LUX & Panzer Model990371Xf04Spirali 6 39 M LUX (SELECTA FRA)Spirali HDR MFAS Spirali HDR Panzer(manual included with the machine, scanned: manual_ocr.pdf)
Image of label
Please definitely read Adding items. Here are examples of it not being read:
More failures at the end of this page.
¶ HOW TO
¶ Open door
- Unlock with key
- Pull up and outwards
¶ Close door
- Ensure there are no keys in power panel
- Close the door, lifting it up at the end, on to the roller.
- Lock by clicking handle in to machine.
- If handle does not lock, lock with key.
¶ Labelling
Image of correct labelling
- Print label
- Make it sticky by removing covers from back.
- Fold the left part downwards, so that both sticky sides touch, and you end up with a 90° change on the label, then fold it 180°. You should end up with something like this.
- Stick it inside the pricing rail.
- If possible, cover it with the item number.
- Change the price (see below)
- Even if the price is same, check by either entering item number in normal mode (check_price.mp4) or setting the price again.
*on the label means the slot is configured for timers. If it does, you have to remove the timer: Programming → 2B → <selection nr> B → 0B
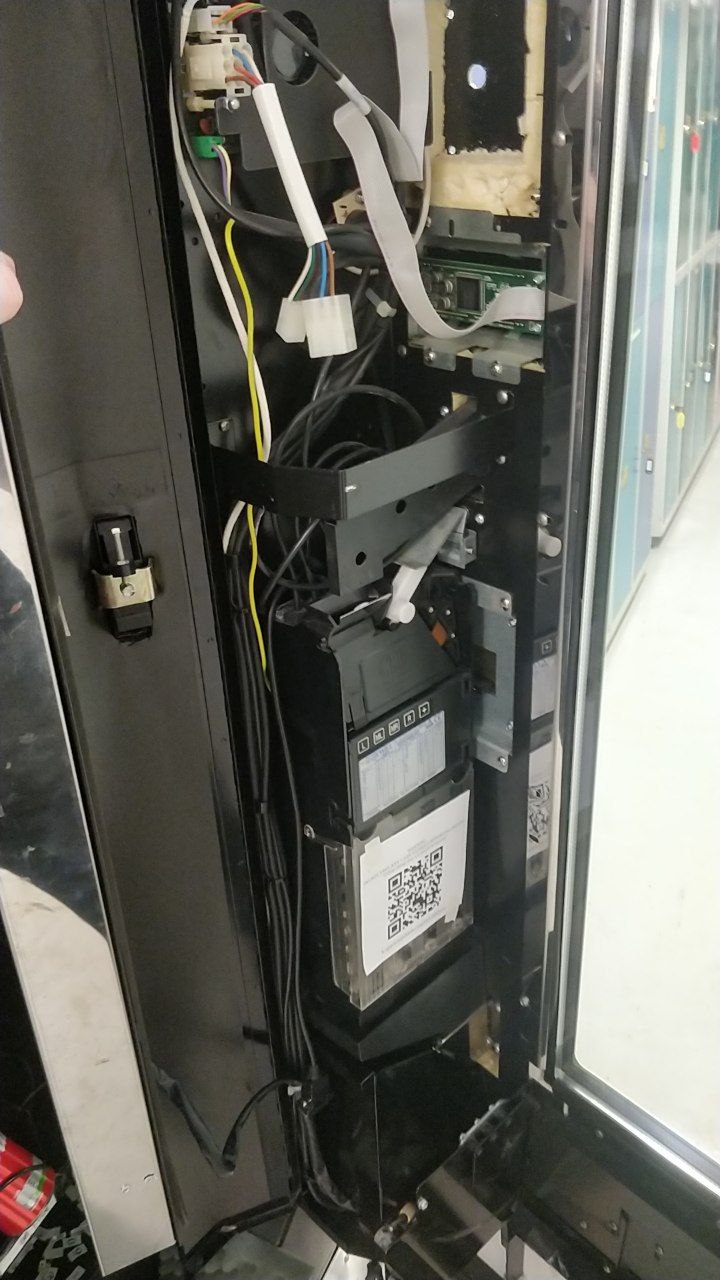
¶ Programming
¶ Powering machine without door closed
Image of the power panel
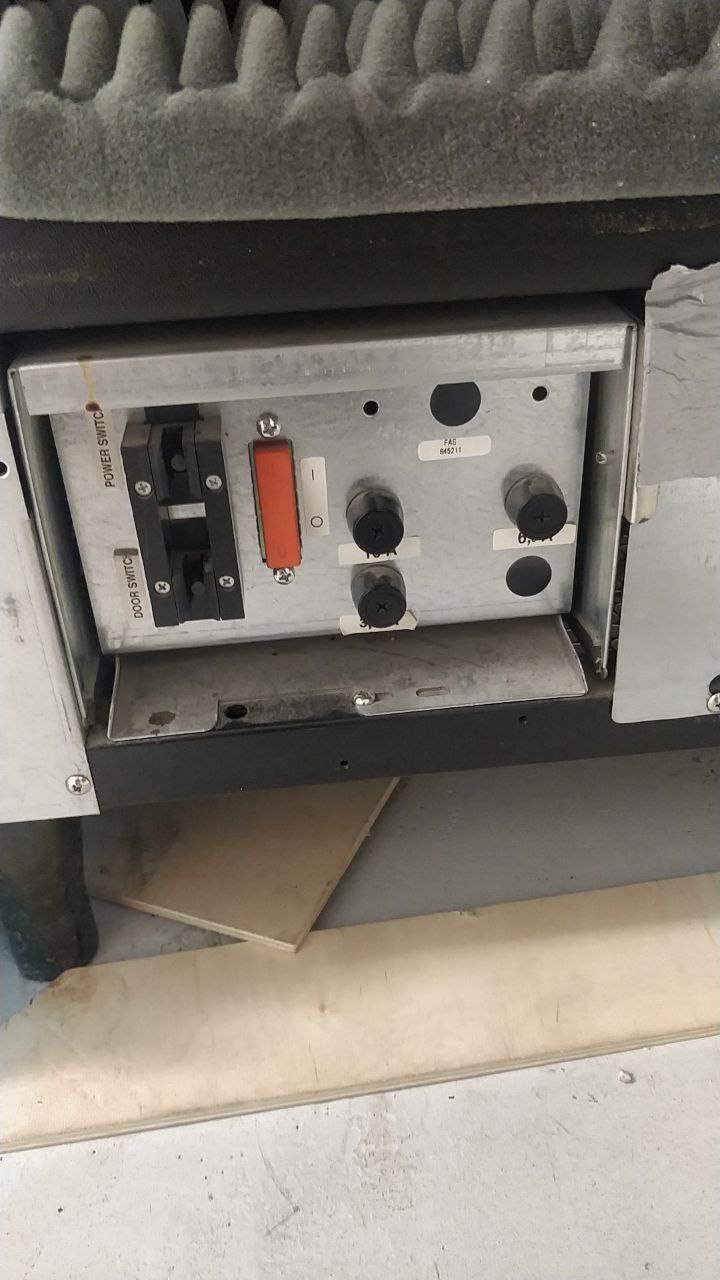
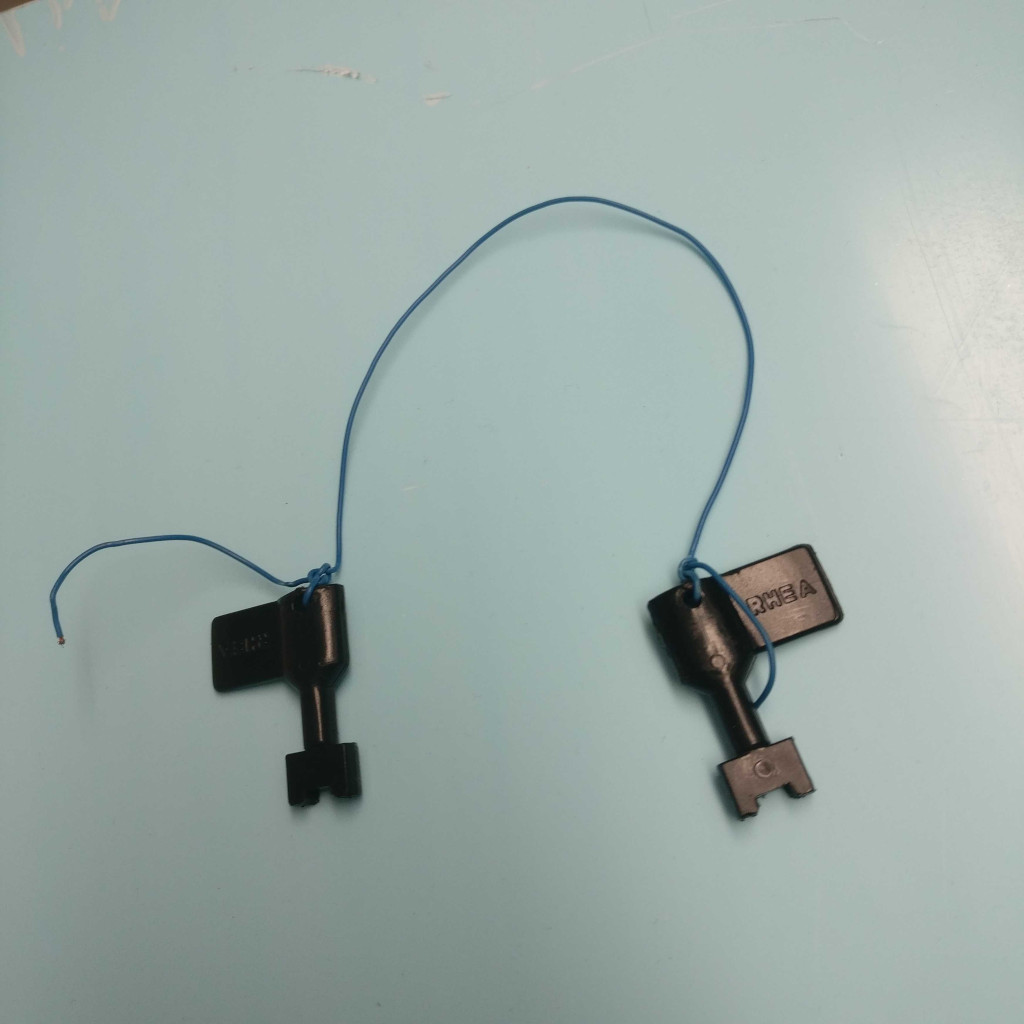
- Find the power keys vending_machine_key_switches_1024px.jpg
- Use one key on the upper switch.
- Do not use both. Using both keys signals that the door is closed, fatal voltage (especially mainboard and lights) will likely be present.
- Activate the switch with a key:
- Push it in
- While pushed inwards, turn 90°
¶ Opening maintenance panel
Image of the maintenance hatch
Close the maintenance panel ASAP, the maintenance door and main door get stuck.
- Push the button to expose the handle.
- Pull handle.
¶ Getting the maintenance panel unstuck
- Almost close the door
- If you can, push in the maintenance door leaver
- Try closing both doors at the same time, as much as you are able.
¶ Make all items temporarily free
- Power the machine
- Press/Pinch the red button momentarily
- Reset by entering programming mode or removing power.
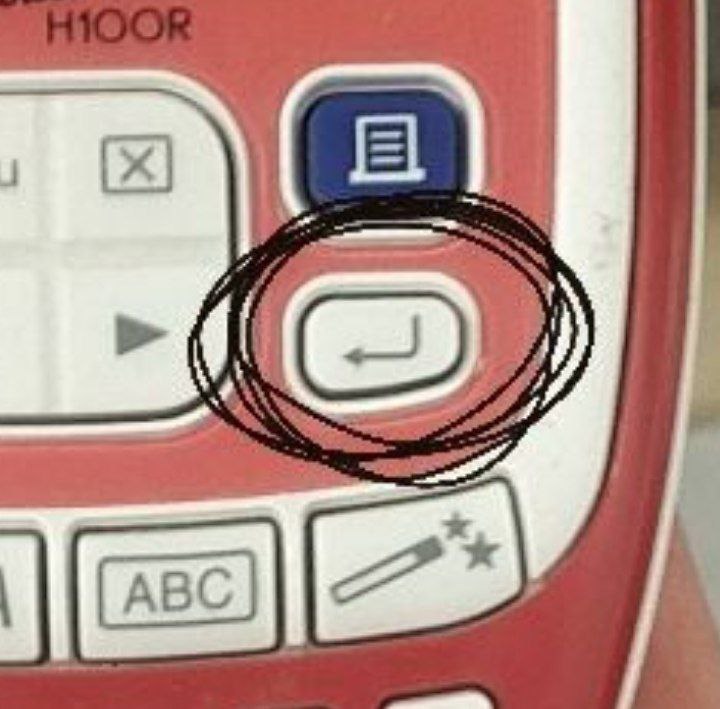
¶ Entering programming mode
- Power the machine
- Open the maintenance door
- Hold down / pinch the red button at the top (labelled accordingly). You will hear a buzzer. When you hear a buzzer, release the button.
- Cloes the maintenance door
Image of success
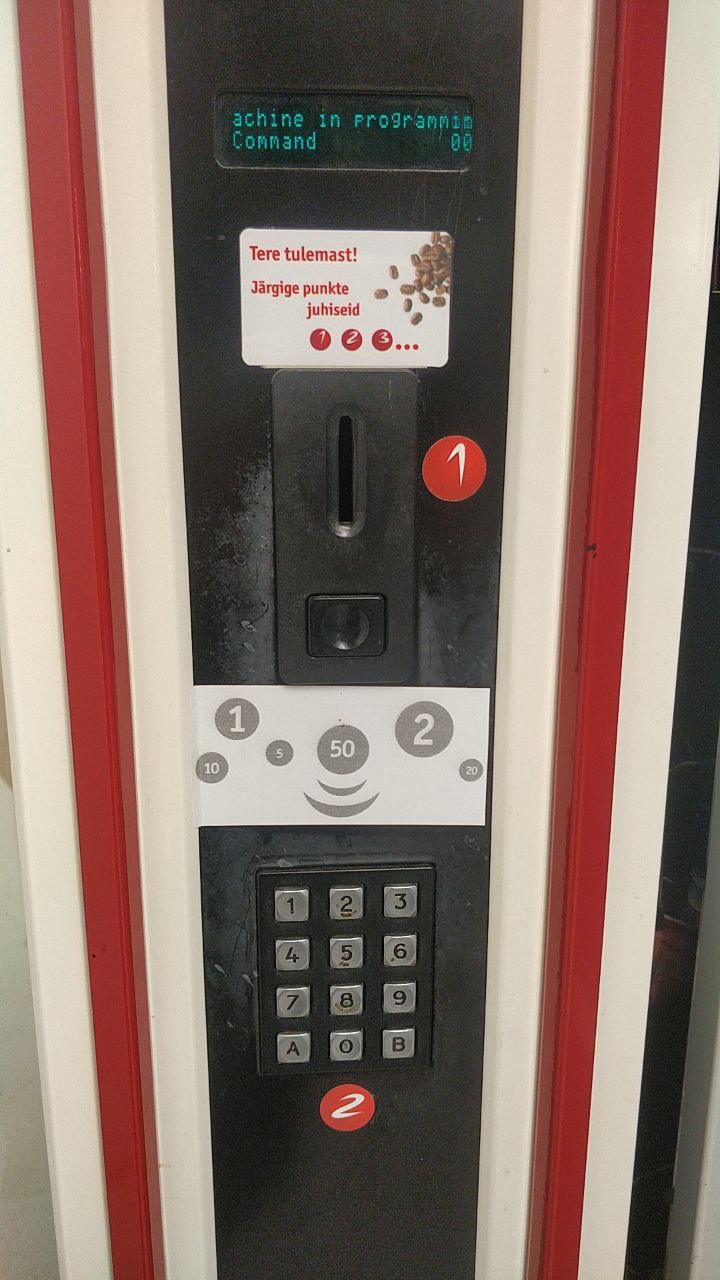
A is back/cancel, B is OK
¶ Change price of an item
- Enter programming mode
- Enter price menu:
3B - Enter item number, and press
B - Set price in cents, and press
B - Price has been changed, you are now back at the price menu.
¶ Price setting
- Goto admin mode
- Key in 03 (mode menu for setting prices) and press B to display.
- Key in #tray_number and press B to display the present value of the price
- Set value cents (e.g. 050 for 0.5€) and press B
- Change physical label
¶ Physical things
Physical parts are located in the lift room across the office.
¶ Pulling out drawers/shelves
- Remove items (likely drinks) that might drop from the front row.
- Placing them on the foam sideways, so that the top or bottom is facing you is a good spot.
- With two hands, pull out the drawer and gently lower it at then end.
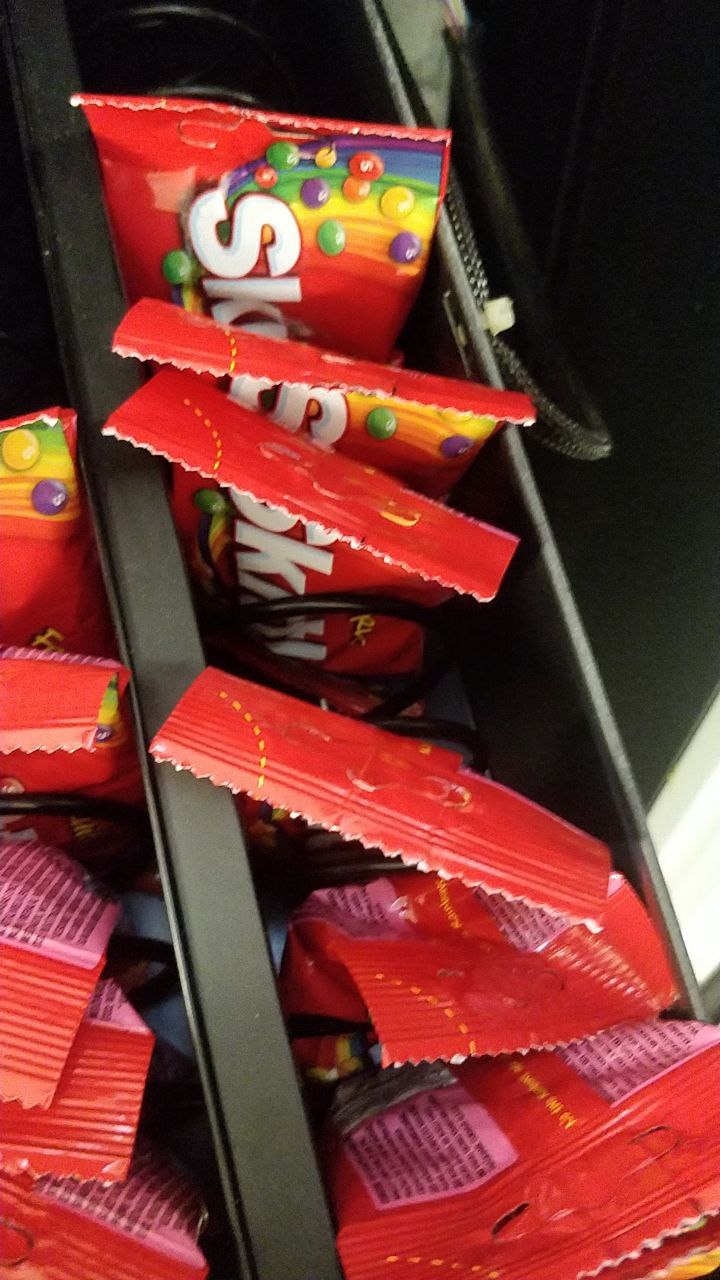
¶ Adding items
- It is easier done with the drawer out.
- Items should not rotate while being vended: long and thin chocolate bars for example might jam each other. The additional metal bars (image) at the sides of some of the slots help with this. There are spares.
- There should be no empty slots in between items, unless intentionally left for a future expiry-price tag change. (example of wrong
- The item should be in its own slot, not in-between:

- Items with an expiration date of more than a month shall not be mixed in the same slot.
- You might need to push the contents upwards / distribute them in the package to fit it in a slot.
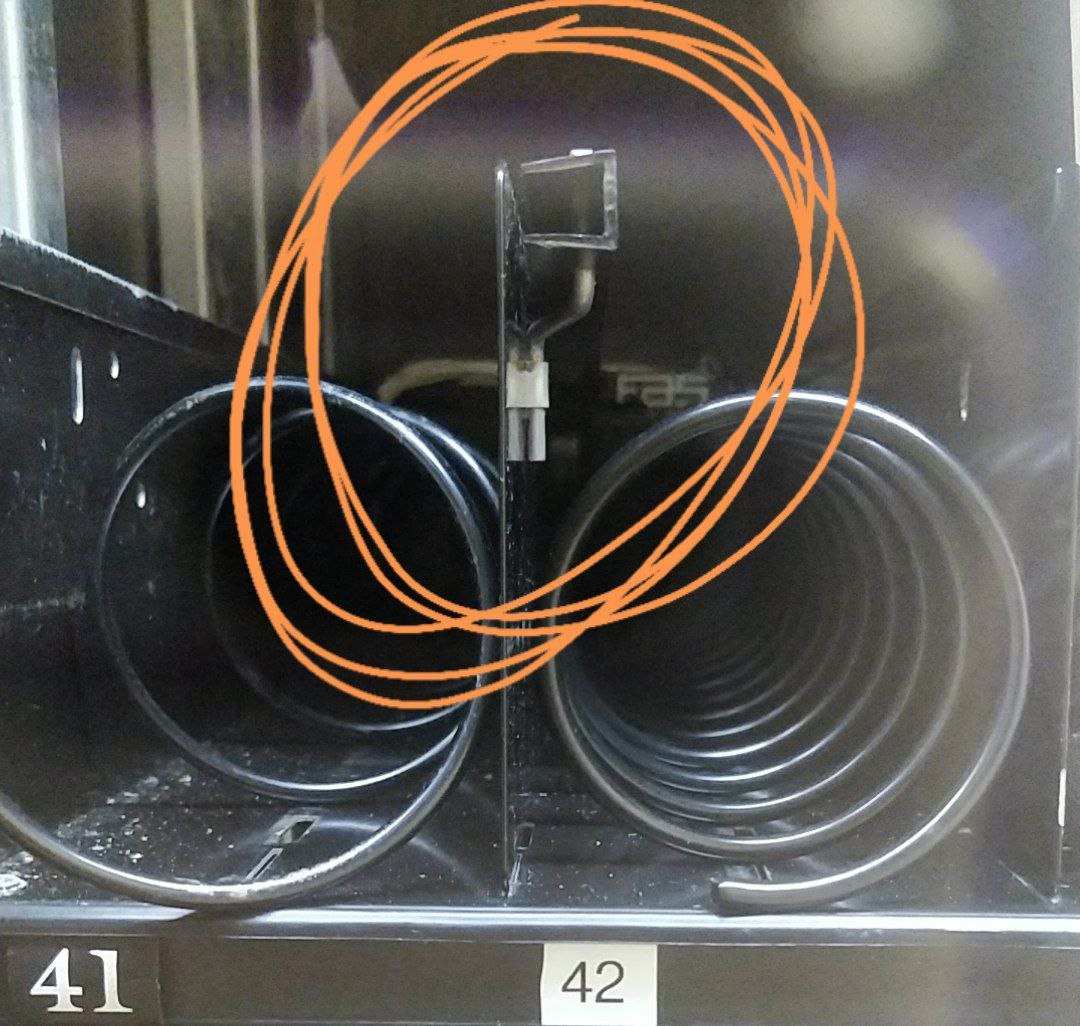
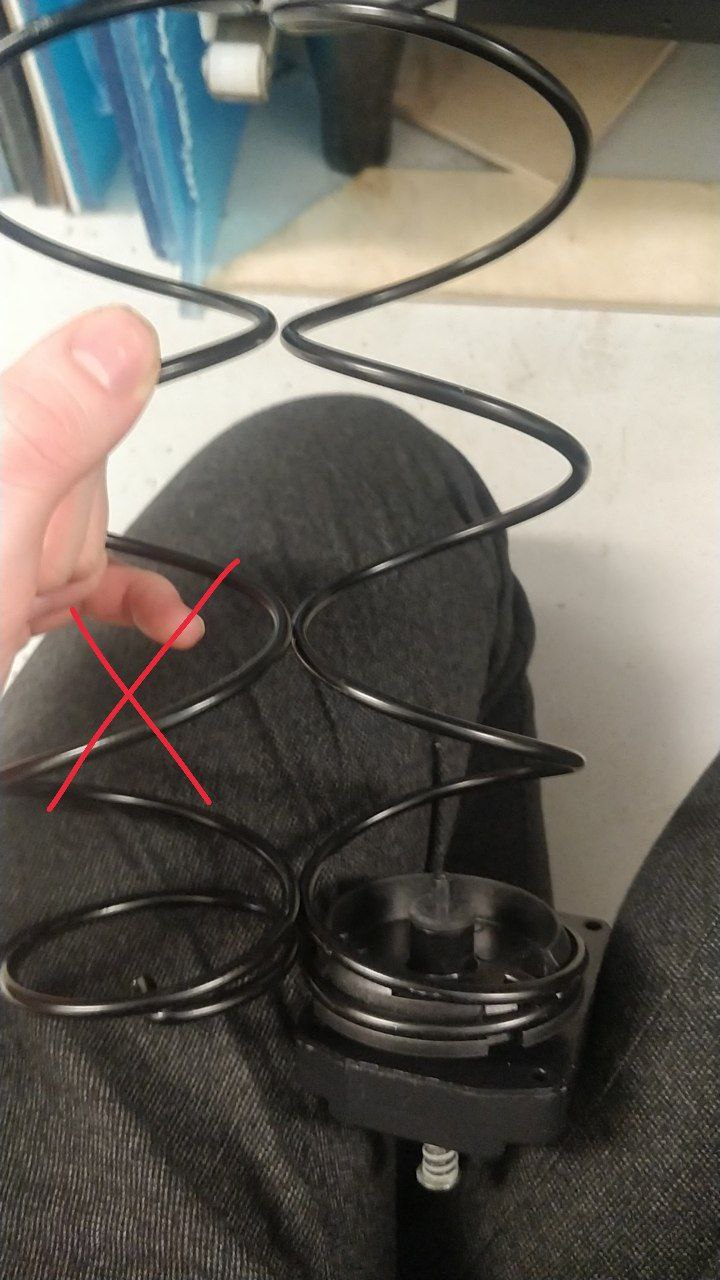
- You might need to adjust the spirals. The spiral shouldn't be further than bottom center point, otherwise, after a full turn, sometimes items are not dispensed, sometimes two are.
- There might be more items stored in the middle office / members room.
¶ Adjusting spirals
- Pull the spiral outwards
- Rotate it, it will click/lock in place.
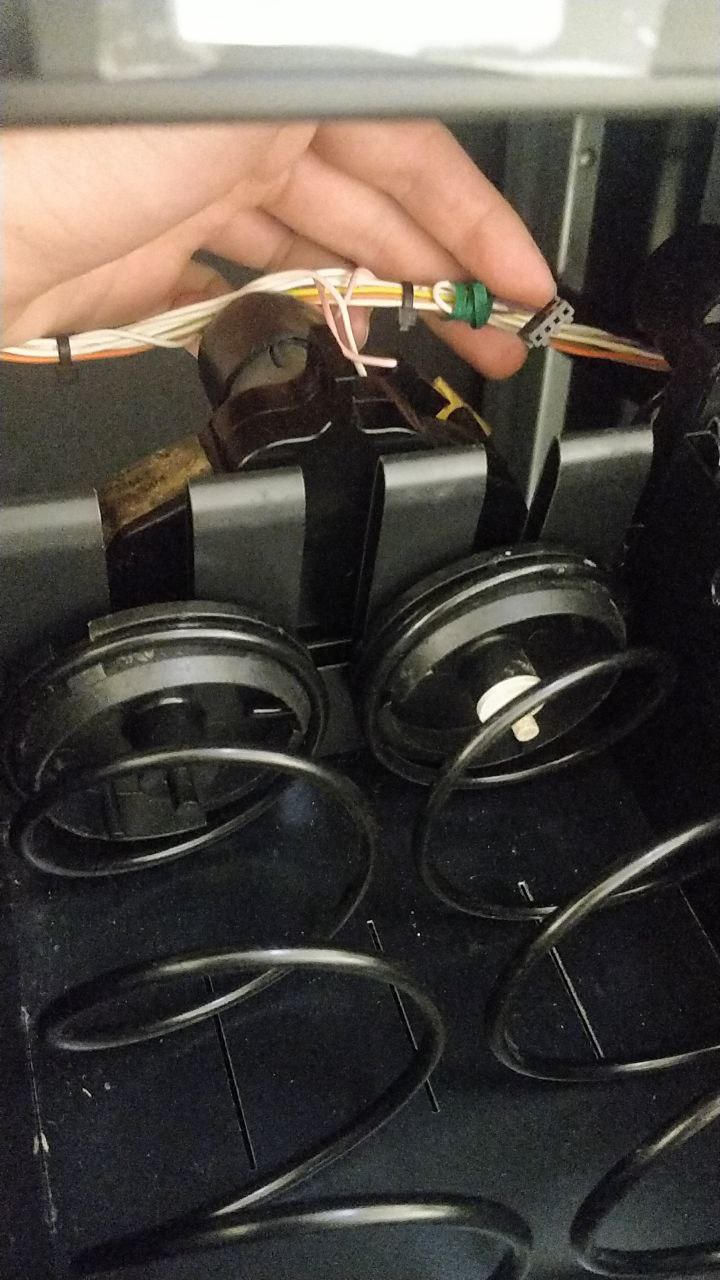
¶ Changing spirals
- Pull out the drawer
- Disconnect the motor cable at the back
- Lift module up and away
- If available, swap the whole module, attaching a different spiral to the motor is hard.
- To swap a spiral of a motor, you have to use force.
- Check that the direction of spirals are compatible (old and new are same direction)
- Reslot module to machine
- Attach cable
- Do not use force! The cables only go one way, and some motors have them in the other direction.
- There might be multiple cables (as is the case with multislot modules).
- Test that the correct number makes it spin (restart machine)
- The machine checks for motors at startup, if it does not detect a motor, it makes the selection unavailable.
- If the motor twitches on startup, there is connection.
- You might've connected to the adjacent numbered slot.
¶ Time lock setting
E.g. for drinks during public events. Mostly section 9.2.4 (page 17 in manual).
Price tag must contain * to indicate you have enabled a timer on the slot.
hold btn until beep
(line break means press B)
02 alarms
36 apply to nr
** selection nr
1 enable restriction (or 0 to disable, enable disablement?)

02 alarms
31 first disable period start
1000 (10:00)
32 first period end
2200 (22:00)
33 second period start
2400 (disable)
34 second end
2400 (disable)

02 alarms
01 (date)
210925 (2021-09-25)

02 alarms
02 time
hhmm
¶ Tips
- Insert tray at a slight angle (5-10 degrees) as inserting horizontally is a tad tight.
- Spiral number logic: the cable goes into the motor and is counted from left.
- There are 5 connectors on the right where the tray cables connect to. Numbering starts from the top. The second item from left, on the second tray from top, is under number 22.
¶ Repairs
There are spare motors and spirals in the Lift room opposite of the Anti-Social room.
¶ TODO
- The top shelf is half-broken (needs a screw) and it needs to be fixed. It feels like it's too wide to fit in the machine correctly.
- Cashless payment using door key card is planned in the indefinite future.
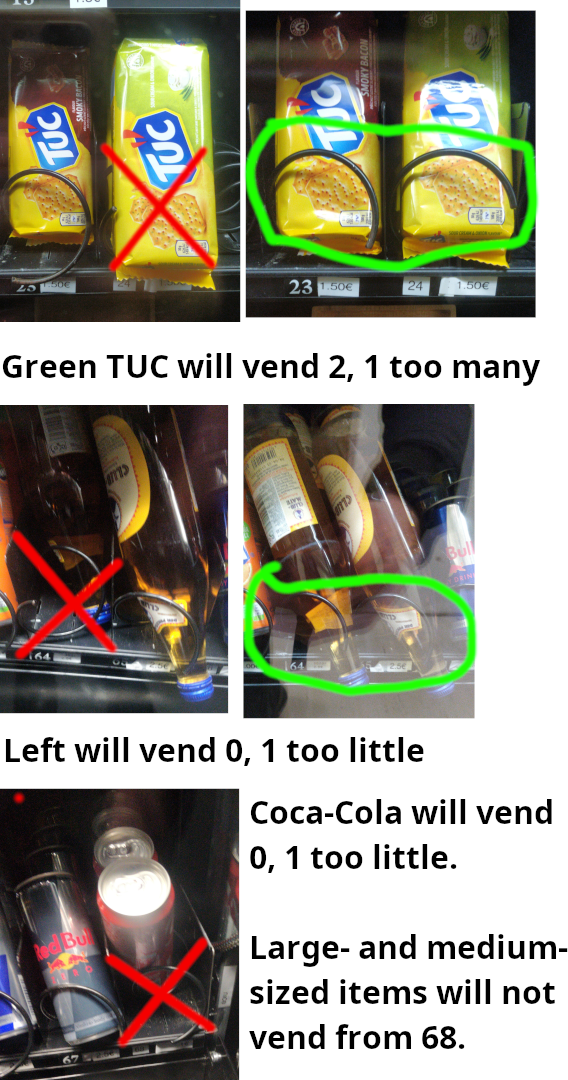
¶ Item placements failures
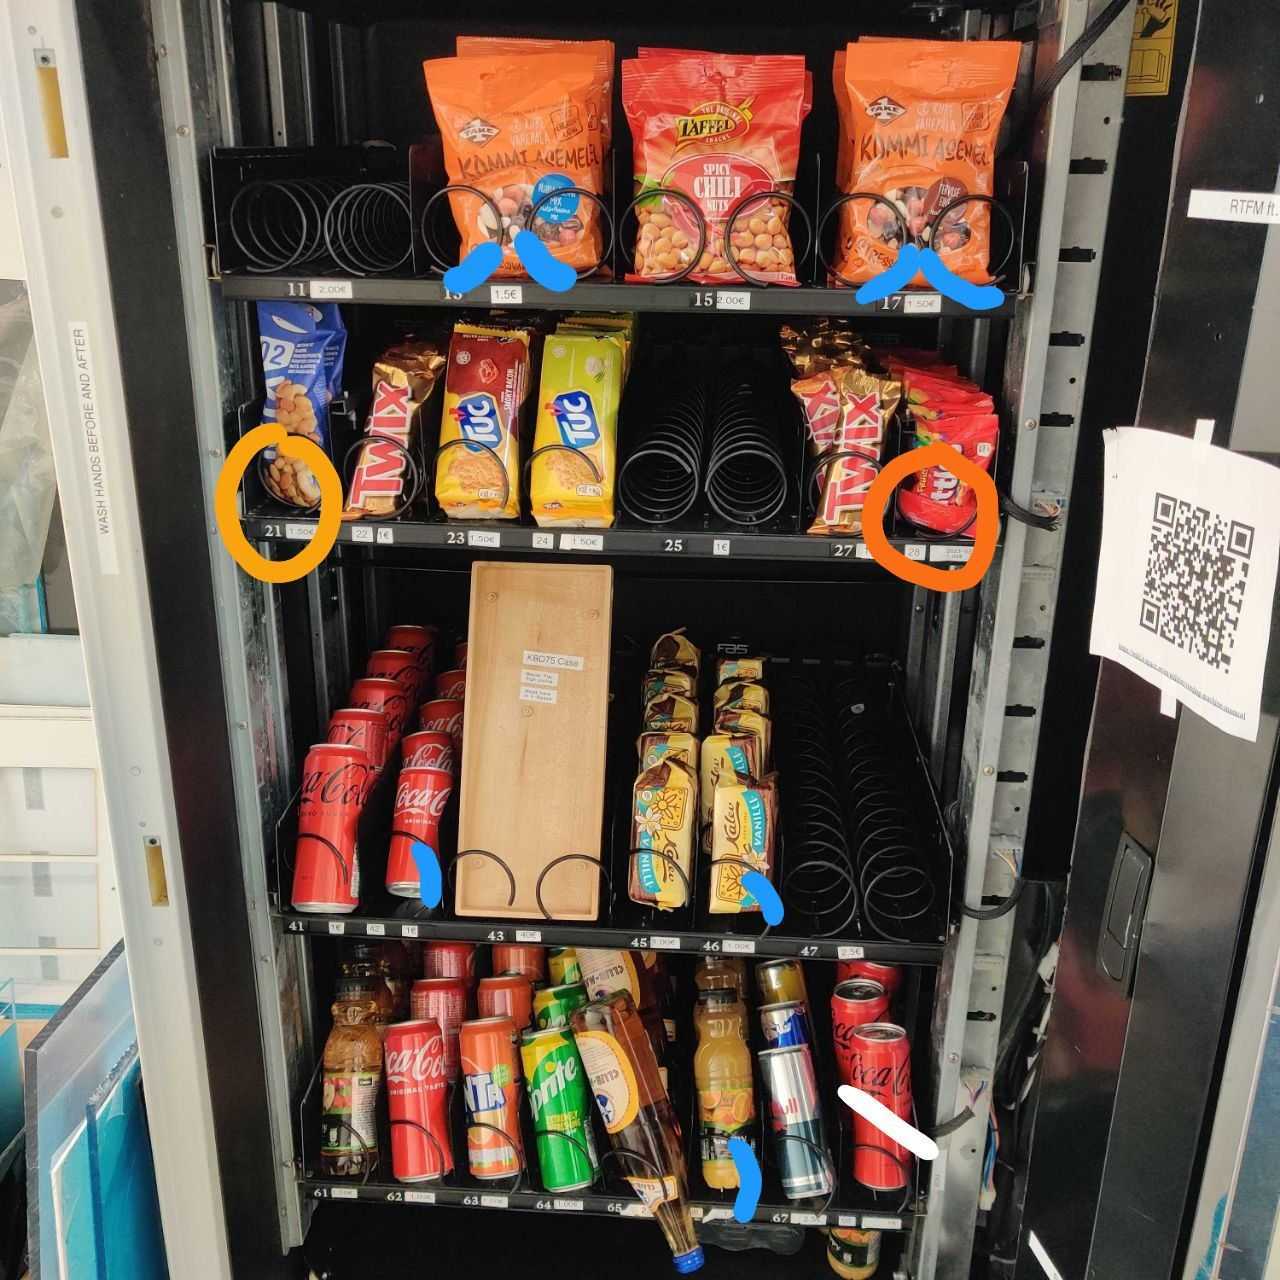
blue: the spiral should not be where blue line is, risk of not vending the first one or alternating 0 and 2 vending (pull the spiral out, and rotate counterclockwise, bringing items a bit ahead)
orange: will not vend the first one (place the package to its hole, not the hole behind it, notice left side of spiral)
white: 68 does not fend fat items, will get stuck to door