¶ 3D-printers
Currenty there are following 3D-printers available to use:
- Lecktor / Prusa i3 MK3S+ - prusa.k-space.ee
- Voron V2 (NB! Only PLA) - voron.k-space.ee
Join the #3dprinting channel on Slack and ask before doing any experiments!
¶ Things to keep in mind
Monitor first layer like a hawk! Bad things can happen otherwise!
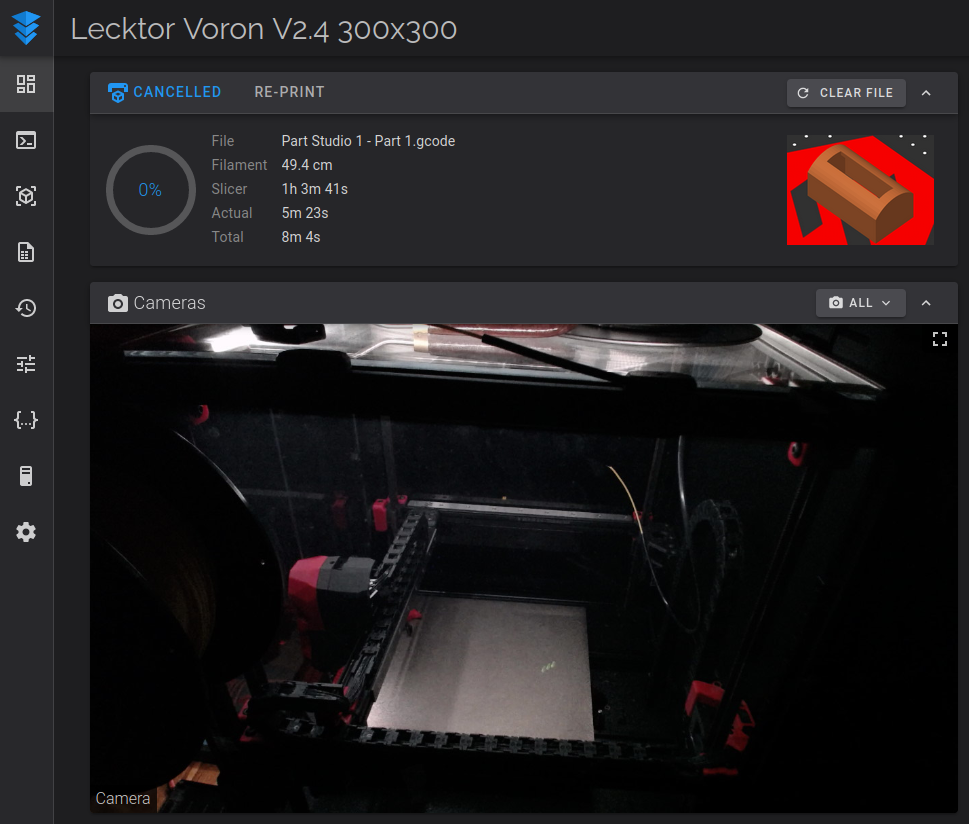
- Check in on your print periodically. Both printers have cameras that are accessible via the WebUI.
- See troubleshooting if your print is peeling off.
- Check what filament is loaded before starting your print. If you want to use something else, see instructions for how to change filament.
¶ Lecktor (Modded Prusa i3 MK3S+)
Printing volume: 250x210x210mm
Nozzle: 0.4mm
Material: PLA / PETG / ???
WebUI: prusa.k-space.ee
Inventory: k6.ee/21Fj
¶ PrusaSlicer setup
The MK3S+ is currently running Klipper firmware instead of the stock Marlin firmware - as such, a couple slicer settings need to be changed before printing. This assumes that you're using the default Prusa MK3S+ profile.
- Top right choose
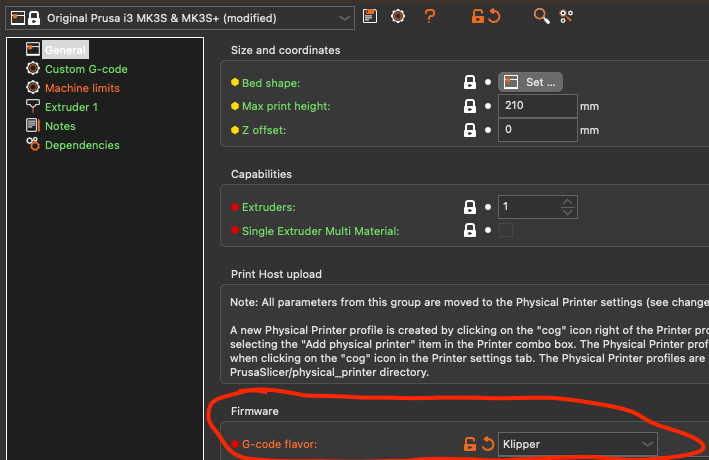
Expert modeinstead ofBeginner mode - Under General in Printer Settings, change G-code flavor to Klipper.
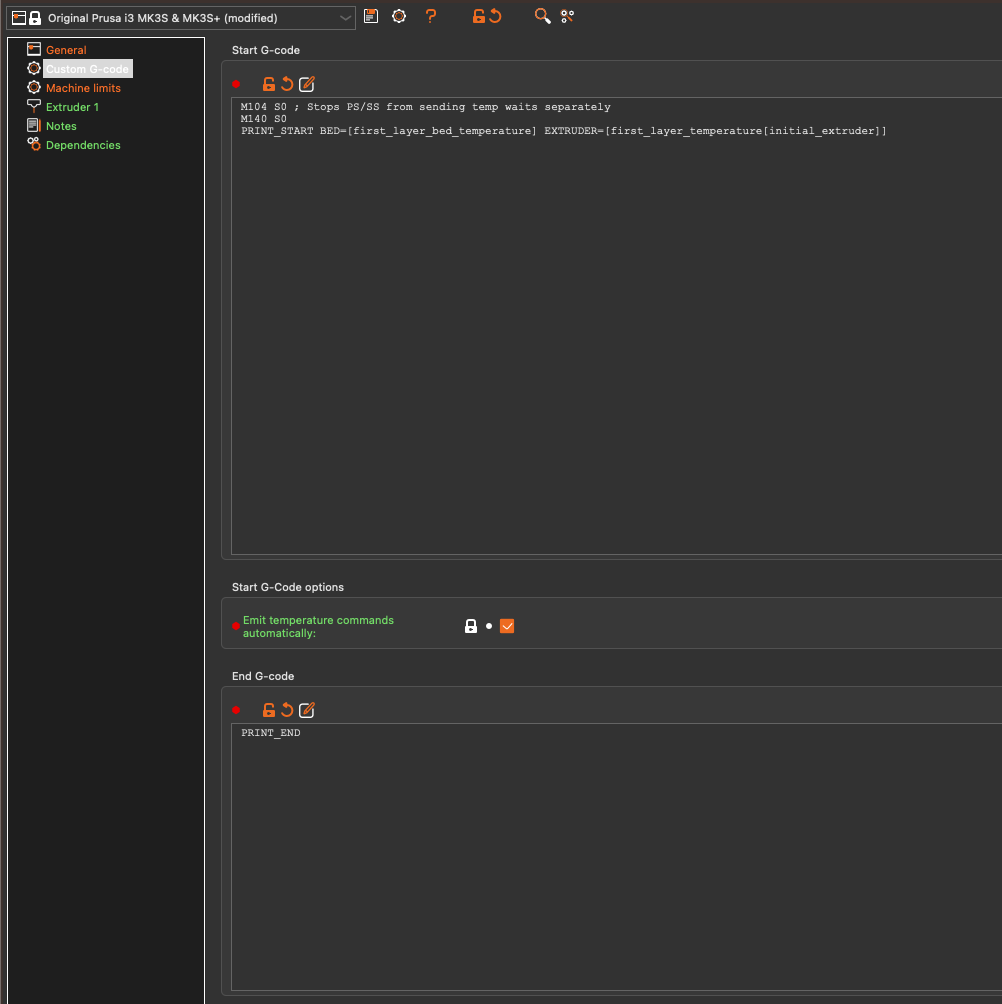
- Under Custom G-code, replace the contents of Start G-code with:
M104 S0 ; Stops PS/SS from sending temp waits separately
M140 S0
PRINT_START BED=[first_layer_bed_temperature] EXTRUDER=[first_layer_temperature[initial_extruder]]
- and replace End G-code with:
PRINT_END
Make sure to save your changes as a new profile!
¶ Printing flow
- Set up PrusaSlicer as detailed above.
- Load up 3D model. (STL, 3MF, etc..)
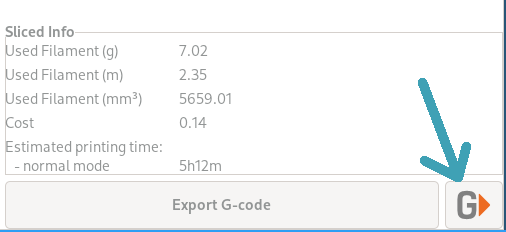
- Slice the model, note how much material is used- (see "Paying for print" below)
- Upload .gcode file to WebUI and print.
¶ Voron V2
Voron V2.4 Stealthburner(?)
Bed 300x300mm
Nozzle size: 0.4mm
Material: (Only!) PLA
WebUI: voron.k-space.ee
Inventory: k6.ee/21gC
¶ Preparing printfile
- Get Prusa slicer
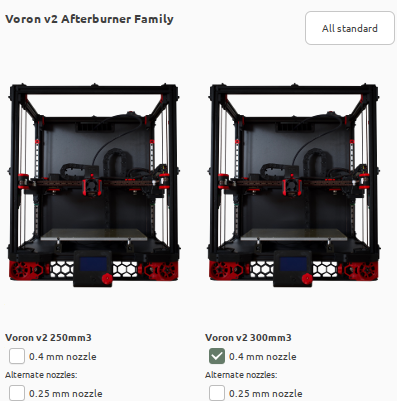
apt install prusa-sliceror https://help.prusa3d.com/downloads (alternative is SuperSlicer) - Select Voron V2 Afterburner with 0.4mm nozzle (Configuration wizard -- under Other vendor)
- Set the Filament type to PLA
- get STL file, open with PursaSlicer
- Select correct printer, layer height and Filament
- Slice and send to printer
Remarks:
- Layer height: 0.2 should be fine for most applications.
- 215 may not be enough for first layer. If the print starts with dry chunks, 220-225 'fixes' the issue. You can change the temperature in PrusaSlicer under Filament Settings.
- It might be a good idea to start preheating to save time.
¶ Sending to printer from PrusaSlicer
Setup:

voron.k-space.ee does not work, it's behind Authelia. You must be in VPN to use the local IP (last time I checked, 100.101.3.1). Select Klipper (via Moonraker).
After slicing:
¶ Printing
- Clean magnetic printing pad (dark gold, thin removable plate) with non-sharp tools, clean the surface (wet towel works, in extreme case use window cleaning liquid).
- Apply layer of glue slime (bottle around 3d printer) and/or glue stick on printing area. Smear it with wet paper towel evenly across the surface. One layer might work for 1-5 printing. YMMV.
- Ensure that glue layer is dry.
- Connect to https://voron.k-space.ee
- Filename must begin with your name
- Upload your .gcode file under Jobs tab. Start print.
- Observe print progress closely (if the glue does not work properly the object may peel off from pad and make a big mess).
- When ready, you may remove printed object immediately -- remove magnetic pad from printer and twist it in two different directions to extract object from pad.
- Remove residues from printer and pad.
Heating the pad makes cleaning easier. Either WebUI: Thermals → Presets → Clean heater bed or from printer: Click wheel → Temperature → Bed
Printers have cameras. Use them (to monitor)!
¶ Changing Filament
- Heat up extruder to required temperature for filament
- Open filament latch (black thing on left top of toolhead)
- Pull out PTFE tube and filament, take spool off the holder (once you've pulled the filament out, make sure to either run the end through one of the holes on the side of the spool or tape it so it doesn't get tangled)
- Take new filament, cut off the tip with pliers at a 45° angle
- Put spool on the holder and put PTFE tube in toolhead, run filament through PTFE tube until filament starts coming out of the nozzle (make sure extruder is still hot!)
- Close filament latch
¶ Cleaning the bed
- Clean the bed under sink with warm water and soap.
- Reattach the bed.
- Calibrate the bed
¶ Bed calibration
Make sure the nozzle is clean of debries/plastic before starting.
- voron.k-space.ee → left menu → tune → Home + Calibrate
- Save as ("default")
- Top navbar right → Save config & Restart
¶ Paying for print
K-Space accepts donations for used filament.
    Recipient: K-SPACE MTÜ
    IBAN: EE467700771002926893
    LHV's BIC/SWITFT: LHVBEE22XXX
PrusaSlicer shows amount of material used after slicing:
¶ Troubleshooting
¶ Gaps in print
TL;DR: Do the first layer calibration.
(TODO: check for printer-specific values. Voron: Z-0,525 ?? )
Example calibration values:
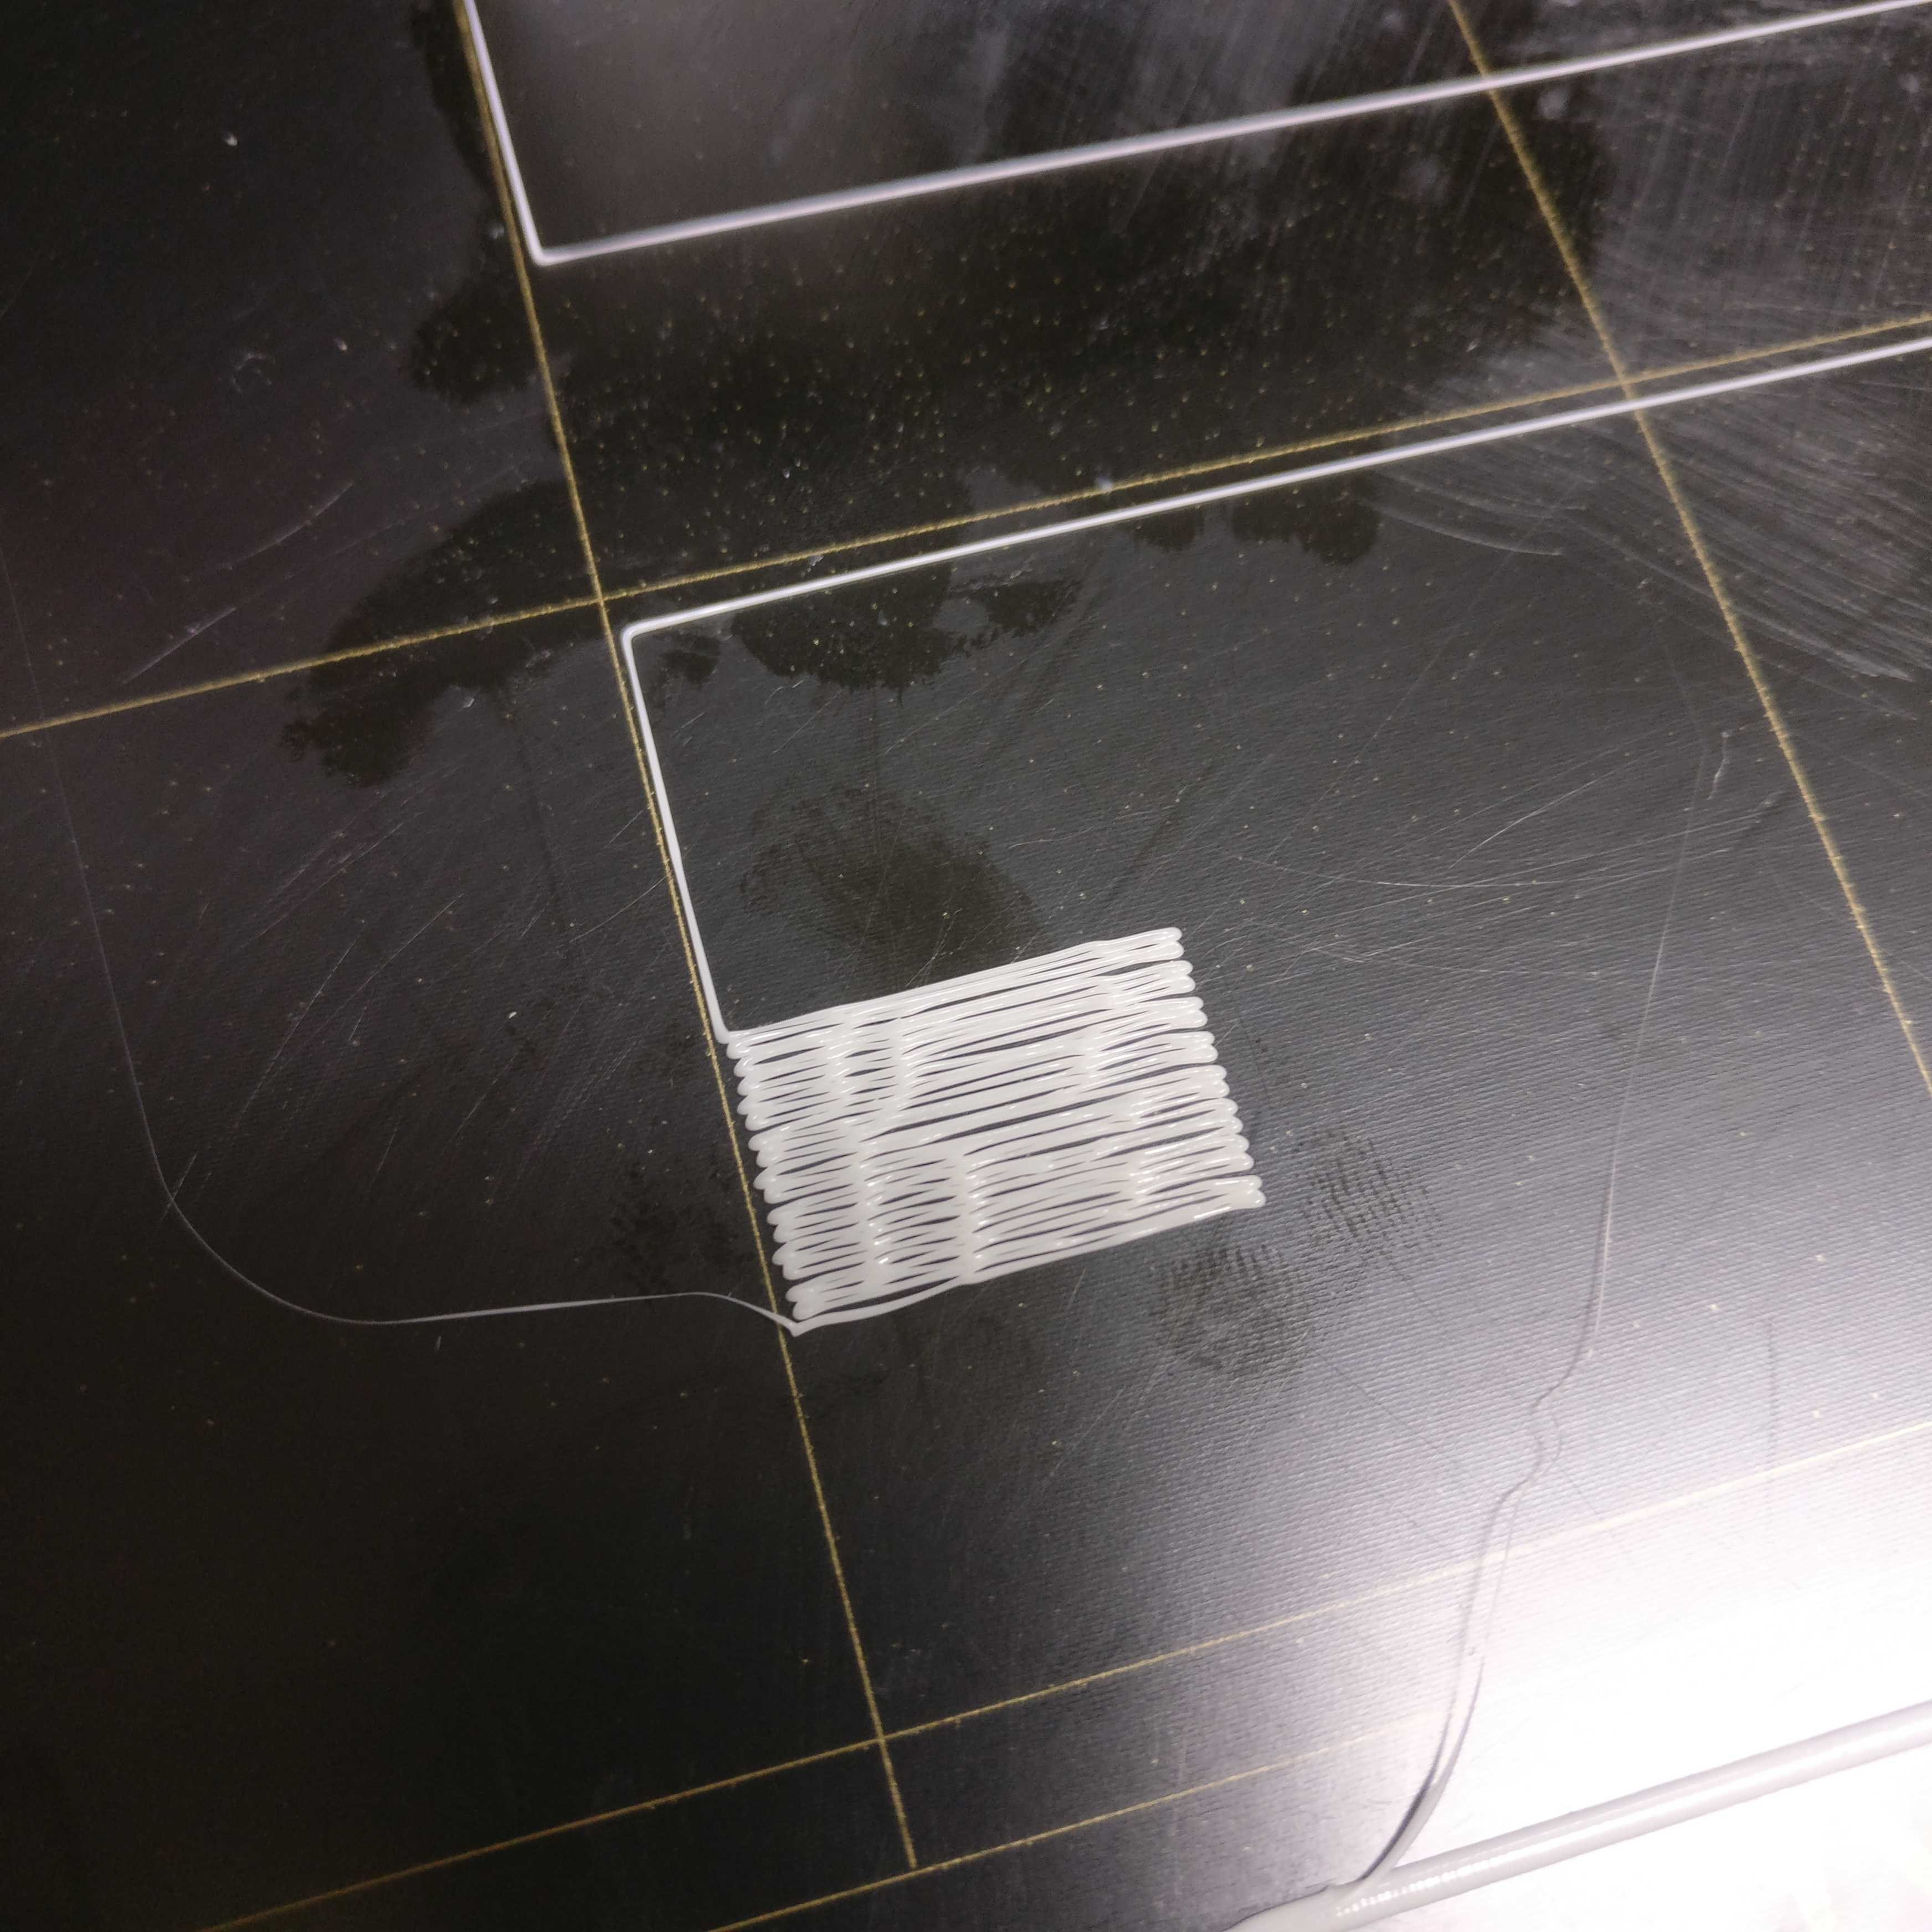
Clean the surface. Try fiddling with the Z-height (menu->calibration->z-height cal).
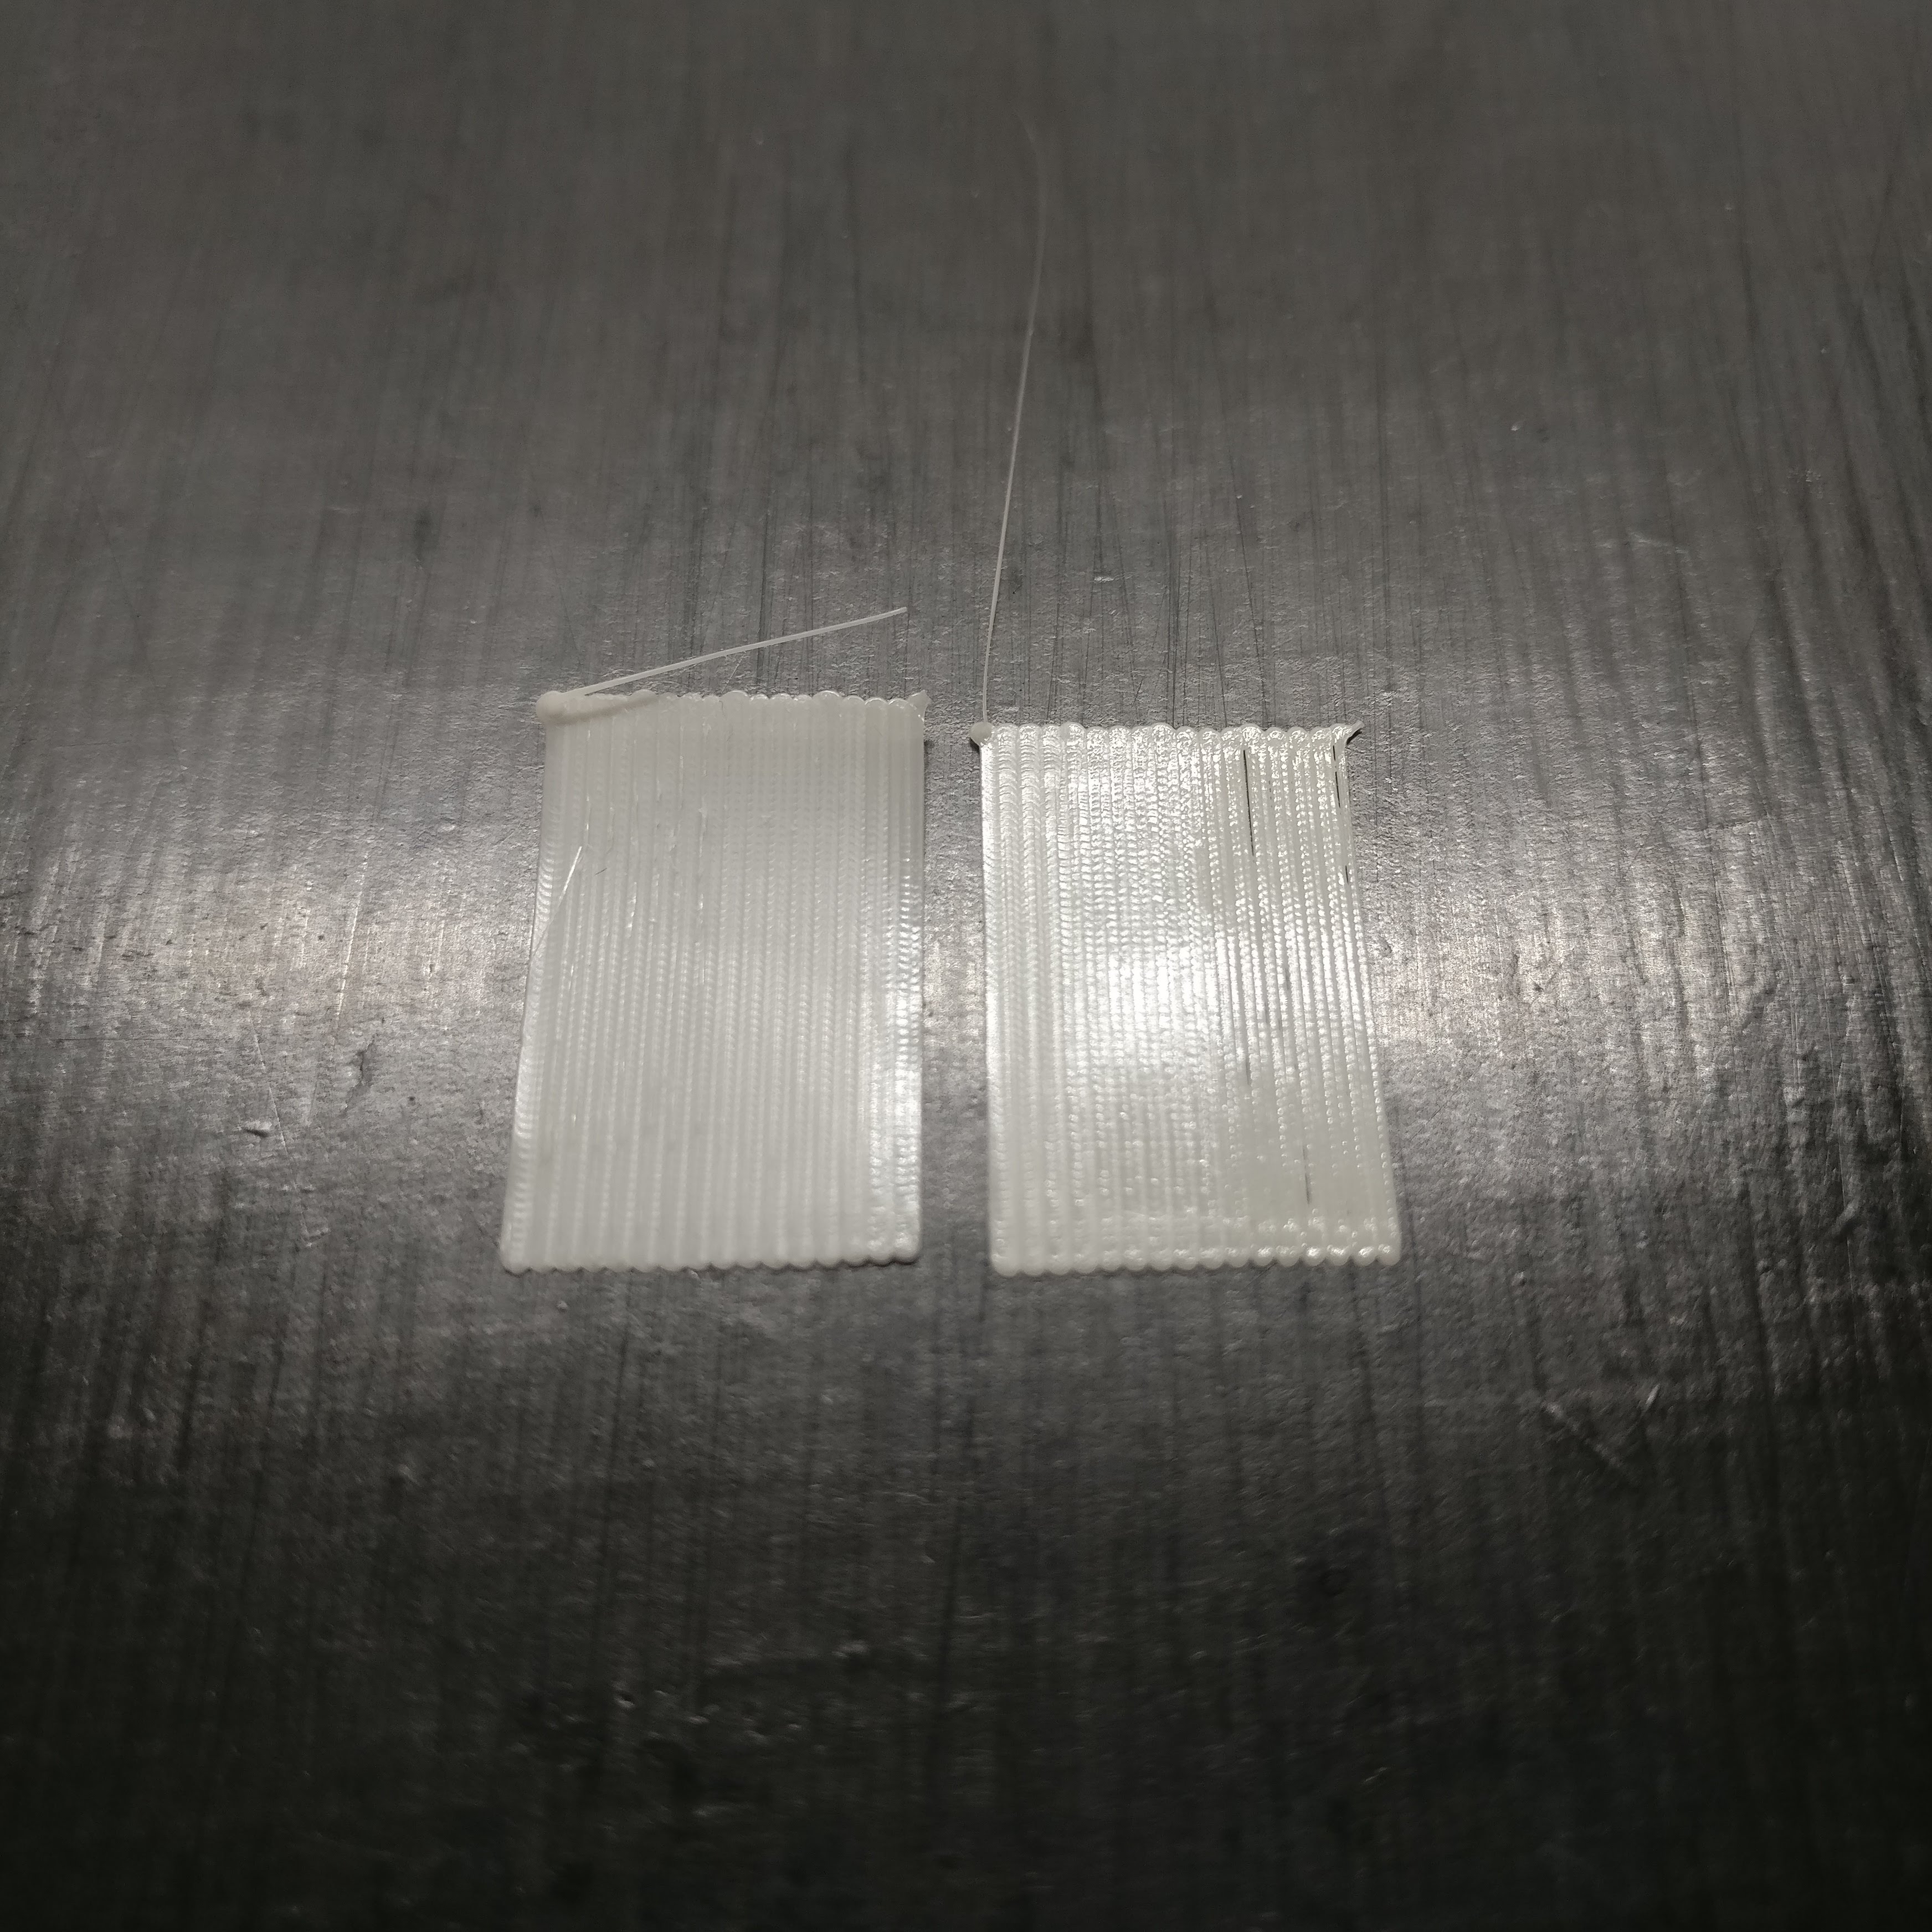
Left rectangle
- 600 (the two leftmost lines)
- 550
- 500
- 450
Right rectangle
- 400
- 450
- 400
¶ First layer peeling off
Follow these tips in order.
- Take off magnetic sheet and wash it with dish soap, water and paper towels. Make sure to scrub thoroughly!
- If that's not enough, use glue.
¶ "No moonraker connection" screen when accessing remotely
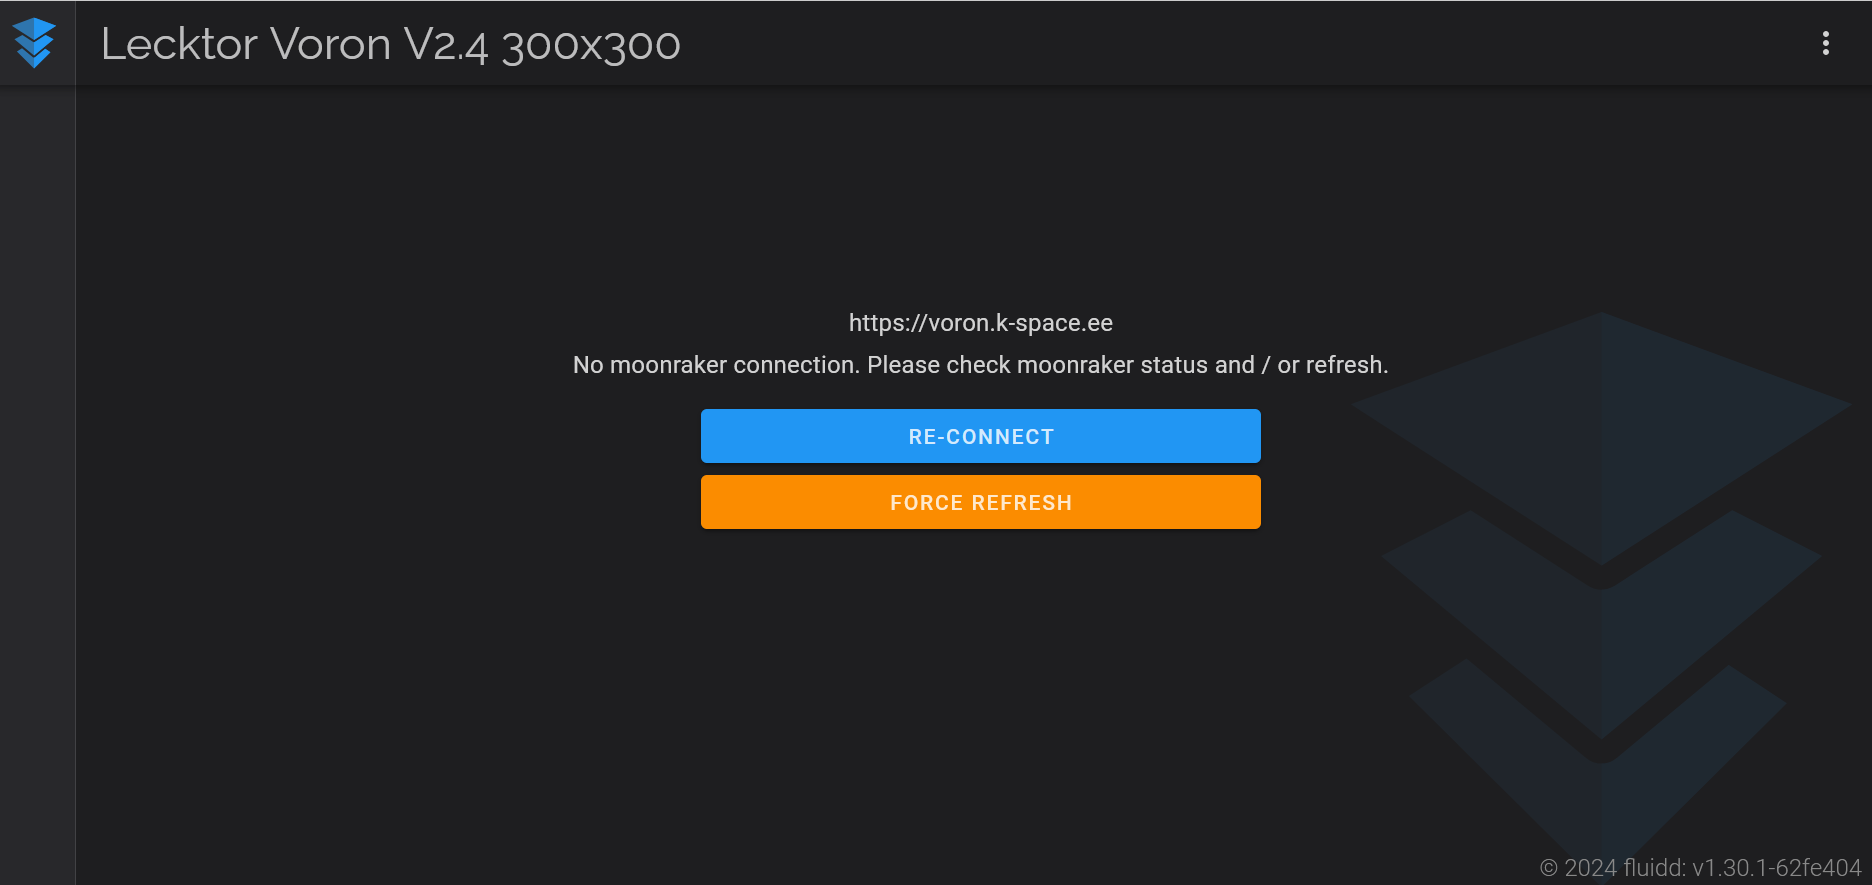
This is a known bug with the remote authentication implementation. Clear your cookies and log in again - you should get access.
¶ See also
https://pad.k-space.ee/p/r.153650aa0a4e375a3f64a53c8dbfa355
https://www.facebook.com/kspace.ee/videos/1033346817231051/ (3D printing intro)
¶ Models of parts
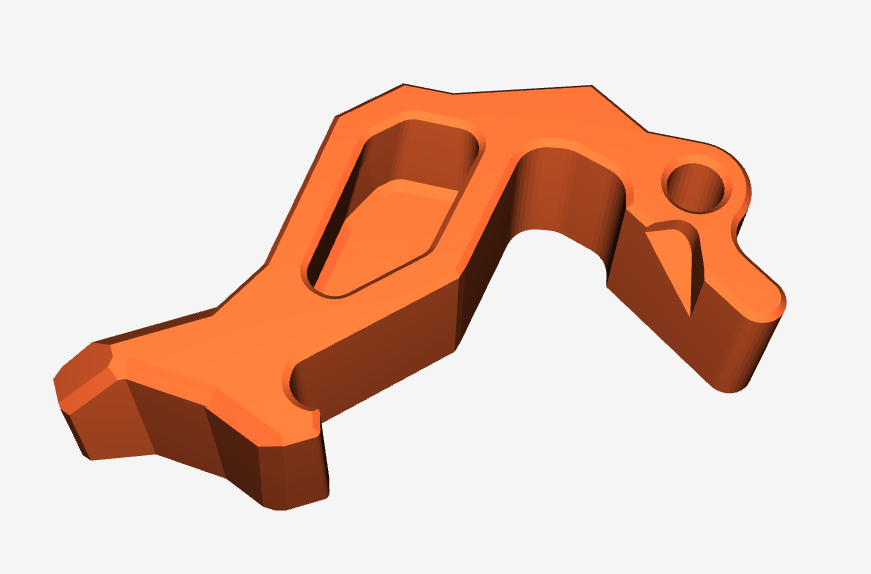
https://www.printables.com/model/315315-voron-clockwork-2-improved-latch#preview:file-S4PWU
