We got some e-ink price tags from atc1441. These can be programmed with a custom firmware which allows changing the displayed image via ZigBee.
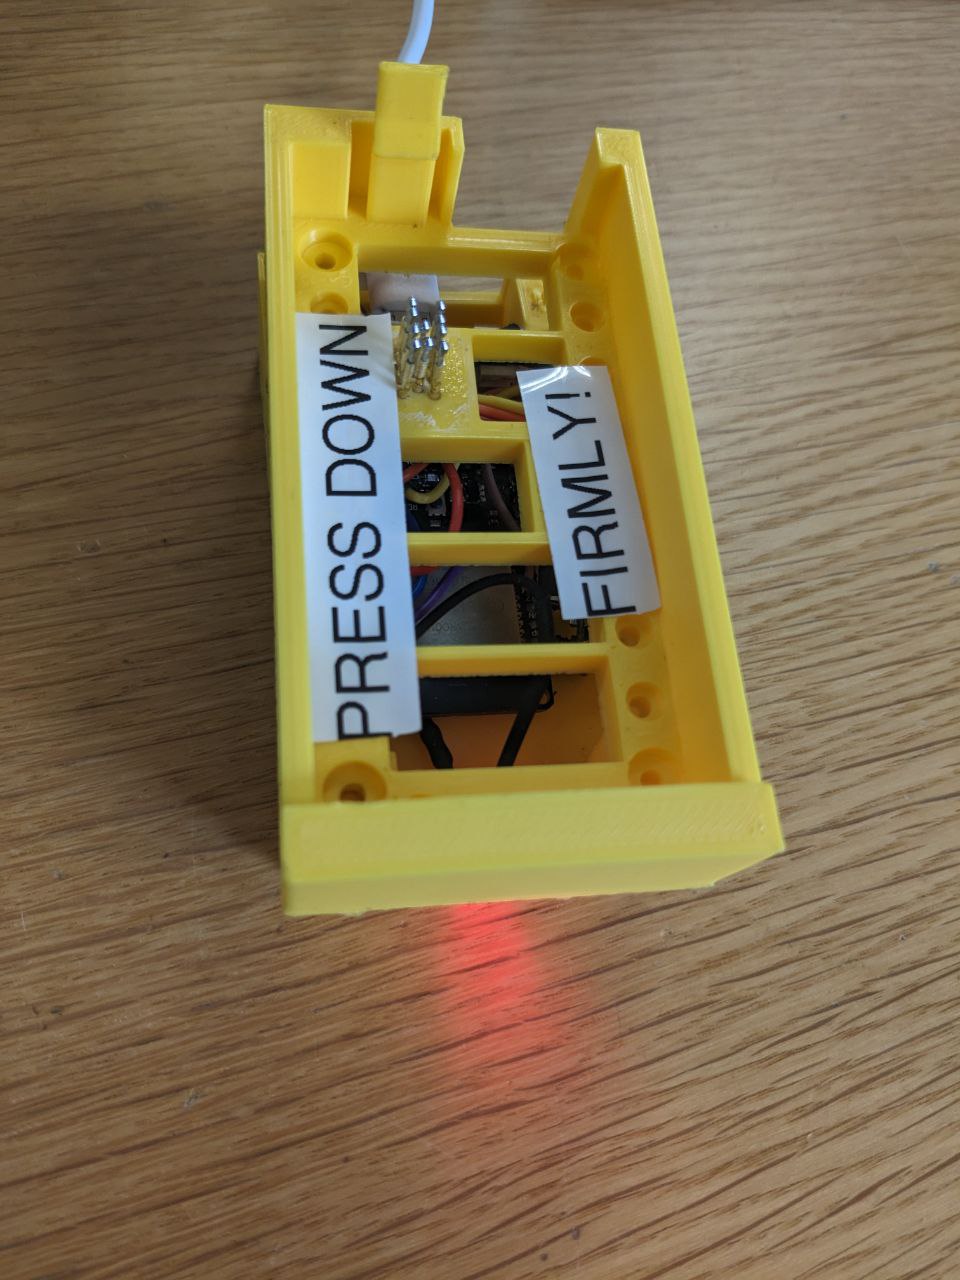
In order to flash and configure the tags, atc1441 has designed a flashing jig and software, which was printed and assembled during the 2023 hackathon.
Jig is based on Wemos Lolin32 v1.0.0. Working platfromio.ini config for building jig firmware (not needed as long jig works. scroll down for flashing labels):
[env:wemos-lolin32]
platform = espressif32@5.0.0
board = lolin32
framework = arduino
upload_speed = 921600
monitor_speed = 115200
build_flags =
    -DCORE_DEBUG_LEVEL=0
    -DESP32
    -D LED=22
    -D ZBS_SS=5
       -D ZBS_CLK=18
       -D ZBS_MoSi=23
       -D ZBS_MiSo=19
       -D ZBS_Reset=17
    # do not connect directly to a GPIO only trough some kind of Mosfet or switch!
       -D ZBS_POWER=16
    # Used to read UART data from the firmware running on the ZBS, not needed at all
    -D ZBS_RXD=33
       -D ZBS_TXD=32
    -D ZBS_SPI_BUS=VSPI
¶ Flashing the tags
Follow the instructions given in the repo. You may need to install custom udev rules so the flasher program can access the ESP32 serial interface without root.
Don't try to remove USB cable. The board wiring is not the best and avoid moving it inside. Otherwise the jig is quite solid and should be easy to use.
Due to flakiness(?) of the entire setup, you may get transient errors several times. Just re-seat the tag and try again. Try --slow in case flashing fails.
Before flashing the custom firmware, you should backup the tag's infopage and replace the 8 bytes at location `0x10` with a MAC address.
¶ A note on the smaller tags
The smaller square tags can also be flashed using this jig, but you have to position them very carefully. A different jig that fits them better has been printed, but not yet assembled.
¶ Flashing example with ZBS_Flasher
As long as ESP32 runs ZBS Flasher firmware, the easiest way to flash tags is to use docker. Local Python (with or without venv) is fine too as long as you can access USB serial device.
> docker run -ti --rm --privileged --device /dev/ttyUSB0 python:3.9 bash
root@7b39de063eaa:/# git clone https://github.com/atc1441/ZBS_Flasher.git
root@7b39de063eaa:/# cd ZBS_Flasher/
root@7b39de063eaa:/ZBS_Flasher# chmod +x ./zbs_flasher.py
root@7b39de063eaa:/ZBS_Flasher# pip install -r requirements.txt

# test if jig works, it should return "32"
root@7b39de063eaa:/ZBS_Flasher# ./zbs_flasher.py -p /dev/ttyUSB0 version
Welcome to the ZBS-Flasher Utility
Using port /dev/ttyUSB0
Flasher Version: 32

# insert label, just in case make infopage backup, flash new firmware, restore MAC address (look at case sticker and prepend with "0000")
root@7b39de063eaa:/ZBS_Flasher# ./zbs_flasher.py -p /dev/ttyUSB0 read-infopage infopage_026D4E633B1F
root@7b39de063eaa:/ZBS_Flasher# ./zbs_flasher.py -p /dev/ttyUSB0 write custom-firmware/demo_firmware_2.9_33_V1.9.0.0.bin
root@7b39de063eaa:/ZBS_Flasher# ./zbs_flasher.py -p /dev/ttyUSB0 mac -m 0000026D4E633B1FFor OpenEPaperLink tags use SOL_M2_154_SSD_0027.bin for 1,54" SOL_M2_29_SSD_0027.bin or for 2.9" label.
¶ Building the base station
An implementation of base station software is available here. We need to obtain a CC2531-based ZigBee dongle to use it.
Alternatively, we could write software for the NRF52840 dongle we own so it exposes the same interface.
Jig can be used as an AP too with one tag inserted using OpenEPaperLink firware for ESP32. Set correct port pinout based on information above. Flash other tags before using ZSB Flasher.
¶ Use case ideas
- Vending machine price display
- Show time of last k-space visit on door opening